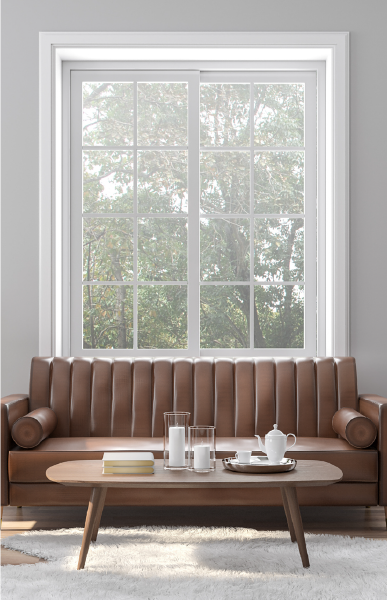
Aside from buying out your local IKEA, the fastest (and cheapest) solution to perking up any room in your home is usually to crack open a gallon of paint. This DIY project can completely change the color and feel of your space in a single afternoon. But when it comes to giving your window frames a makeover, you may be wondering how — or even if — it’s a good idea to paint them as well.
Window frames come in plenty of different colors, shapes, and materials, but most contemporary homes use vinyl frames. And painting vinyl window frames is not only tricky — it can be controversial. This advanced DIY project gets mixed reviews depending on whom you ask. A contractor will tell you it’s a fine option, while your window manufacturer may get nervous. So what’s the right answer?
Before slapping a new layer of paint on your vinyl windows, there are a few important things to take into consideration. Let’s take a closer look at the steps you need to take to successfully (and safely) paint your vinyl windows.
Research the Scope of the Project
Painting your vinyl windows is a big move. Are you a DIY pro? Or a seasoned “start out strong and peter out halfway through” type of project completionist? Be honest about your skill and commitment level before beginning.
Make sure to factor in the tools, supplies, and time required before tackling it yourself. And consider asking for help — especially if you’re thinking of painting the exterior of your second or third floor windows. Be aware of the risks involved. If you’re working on a ladder, you should have an extra pair of hands and eyes helping you. Don’t forget to factor in weather conditions, too. A clear, mild day with low humidity is ideal.
With all these considerations added together, you may well discover that it’s more economical to replace your windows. If you’re at all unsure, go ahead and get an estimate for window replacement. Home window replacement has one of the highest returns on investment of any home improvement project. While painting your vinyl windows will only last a few years (if done correctly), new replacement windows will be with you much longer. You’ll be rewarded with energy-efficient replacement windows, and that aesthetic boost you’re looking for.
Consider that potential future buyers may be turned off by painted vinyl windows, especially if the project doesn’t turn out as professional-looking as you might have hoped.
Check your Windows’ Warranty
A surefire way to lose money is to crack a pane or break a seal while messing around with your window frames, but another risk you take is voiding your windows’ warranty.
If your goal is to transform a white window frame into a chic black, be aware that dark colors in direct sunlight will heat up more than lighter colors, and the increased temperature could lead to the vinyl weakening and the window warping. If you’ve voided your warranty, the resulting draft, or inability to open and close your window, could end up being your responsibility.
Some window companies may allow you to paint your window frames, but could restrict you to a few select colors. Reach out to your warranty company and make sure you are protected.
How to Paint Vinyl Windows
If you’ve done your homework and are the type of intrepid DIY adventurer who is ready to take fate into your own hands, painting your vinyl windows may be the perfect project for you. Below, we walk you through how to paint vinyl windows in seven steps.
Step 1: Clean and Dry your Windows
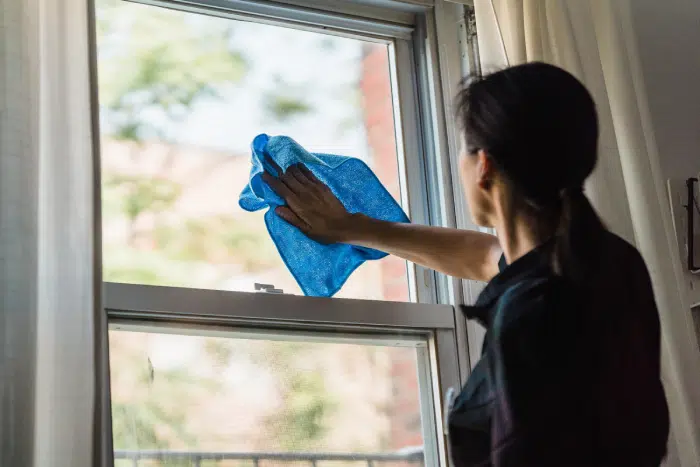
Before you fully commit to this project and invest in your supplies, take an afternoon to clean your windows.
You can clean your windows by filling a bucket with warm water and adding a mild dish soap. You’ll need about a teaspoon of dish soap per gallon of water. Give the frames a gentle scrub with a lint-free cloth. Before you let your windows dry, go back over them with a second round of plain warm water to remove all the soap.
You’ll need to pay special attention to the interior window tracks, making sure to get rid of any loose debris. Start with a vacuum attachment to get the larger debris, and keep going until you don’t see any dust or crumbs. Removing all dirt prior to painting helps ensure that the paint adheres properly.
Lastly, stand back and admire your work. Check in to see how you feel about proceeding to the next steps. You may fall back in love with your newly clean windows — or discover that this initial step has been enough DIY for you. (If so, consider contacting Window Nation for a free quote on replacement windows.)
Step 2: Gather your Supplies
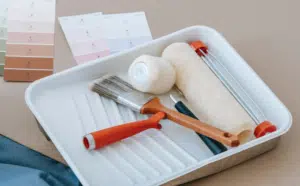
It’s time to head out to your favorite paint store. You’re going to need:
- 220-240 grit sandpaper
- Vinyl primer
- Painter’s tape
- Vinyl safe paint
- Drop cloths/Plastic sheeting
- Brushes/Sponge brush/Paint sprayer
You’ll need 220-240 grit sandpaper to create a surface that the paint will adhere to. You can use a small electric sander to make the work go faster, or do the work by hand.
Primer is a necessary step, and there are a number of vinyl primers on the market to choose from. Take the time to read the instructions, and let the associates help steer you in the right direction.
No matter how steady a hand you have, you’ll need to properly apply your painter’s tape. Don’t skimp on tape and don’t underestimate how much you’ll need.
Hopefully when it comes time to pick out your paint, you know exactly which paint colors have the approval of your window warranty company. The color you choose needs to take into account the base color of your window frames. Professionals recommend that white windows should only be painted colors with a Hunter L value of 60 or higher. With this scale, 100 is white. If your vinyl frames are beige toned, you can paint them with any color that has a Hunter L value of 40 or higher.
Windows that are black, or darker colors like forest green, should not be painted. It’s a good idea to stay neutral in your color choices and stick as close as possible to the original shade of your vinyl windows.
If you are comfortable renting and operating a sprayer, you can forgo picking up brushes. You’ll just need to be even more thorough with your drop cloths, sheeting and painter’s tape.
Step 3: It’s Time to Sand
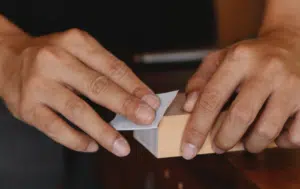
Vinyl is a smooth surface that repels liquids — and that’s generally a sought-after quality in window frames. But when painting, it can prove to be tricky. A proper sanding will create a surface paint can adhere to. Make sure your sandpaper reaches into every corner of your vinyl window frame. You want the surface to feel slightly rough to the touch when you’re done.
It’s important to note that you’re about to pass the point of no return. Once you take the sander to your windows, you’re committed. Beyond this point, even if you remove your paint down the line, you’ll have scratched frames.
Once you’ve sanded thoroughly, you’ll need to clean off all of the dust. Any leftover dust will stick to your wet paint and create an uneven texture.
Step 4: Get out the Painter’s Tape
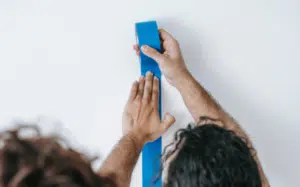
While finicky, this is one of the most important steps of the process. Taping out and covering all of your surfaces takes time, but you can always tell when someone rushes this stage. Paint on your window panes themselves will look tacky and unprofessional, so it’s worth it to be exacting.
You’ll want to cut out squares of plaster sheeting to cover all of your window panes. Tape down these squares with your painter’s tape, making sure to get as close to the edge of your window as possible. Pay special attention to the corners.
If you are using a sprayer for your paint, cover the areas around your windows too. Lay down a drop cloth for your floors if you are working inside. Plastic sheeting can also work, but can quickly get slippery. Be careful if you go this route. It’s fine to use old sheets to cover your floor — you’ll just want to be on high alert for spills. Paint soaks through fabric quickly and you could end up with a big mess on your rug or hardwood.
Step 5: Next up is the Primer
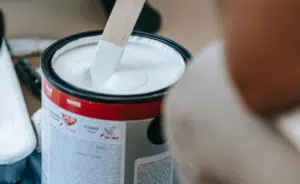
You’ll typically only need to apply one coat of your primer. If you aren’t using a sprayer for the project, use a sponge brush to apply your primer. A sponge brush can help you create a smooth appearance and avoid ugly brush marks on your final project.
Be sure to read all of the instructions on your primer, and allow time for the primer to dry completely before you move on to painting.
Step 6: It’s Time to Paint
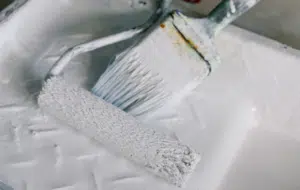
You are probably going to need to do two coats of paint over your primer. Use your sponge brush to apply your paint in a nice thin even layer. Trying to apply too much paint can create drips. If you do notice a drip forming, clean it up quickly. If your drip dries in place, you’ll have a lumpy appearance on your final project.
Give your paint plenty of time to dry between coats. Rushing between coats could lead to flaking paint. Take your time and do a nice, even, clean job.
Step 7: Clean up and Enjoy

When your paint is about 80% dry, you can start to clean up your supplies. Your drop cloths are reusable, but you’ll want to make sure they are completely dry before folding them up and storing them in the garage. Your sponge brushes are probably trash, and those plastic sheets might be headed for the recycling bin. If you used a bristle brush, a good rinse will render it reusable for future projects.
If you have a significant amount of leftover paint, make sure you label it clearly with the room and project — even if you think you’ll remember later on. If there’s not enough paint left to be worth saving, dispose of it according to your local environmental guidelines and keep a record of the brand, color, and type you used.
When your paint is dry to the touch (about 1-2 hours), you can remove your painter’s tape. Painter’s tape is designed to be easy to remove, but you’ll want to work carefully and slowly. Pull at a 45-degree angle away from the surface, and use a razor blade to score any sections where you’re worried the tape might pull up the paint with it. Clean paint lines — especially along window edges and moldings — is the mark of a job well done.
Are you prepared to paint your vinyl windows?
If the above steps seem too time-consuming or complicated, you can always hire professional painters to take this one on. But now that you know the proper steps, make sure whomever you hire is following all the above guidelines as well. You want them choosing vinyl-safe paint, in warranty-approved colors.
Painting vinyl windows is not the easiest or quickest DIY project out there. It’s a lot of hard work, and you may be rewarded with a window that is no longer fully functional. It’s a bit of a gamble, so be sure you stay in communication with your window warranty people. Go in with your eyes wide open.
Alternatively, you can request a free quote from Window Nation to explore replacing your windows entirely. New vinyl windows will save you money on energy costs, and window replacement has an extremely high ROI if you’re considering selling your home within the next few years. Consider new vinyl windows from Window Nation to get the color, style, and warranty you want today.