Some people love rainy days—they’re the perfect excuse to stay home, unwind, and enjoy the space you’ve carefully cultivated for yourself. But if your home has leaky windows, a rainy weather forecast is cause for concern. Leaking windows aren’t just annoying: they can ruin your drywall, cause dangerous mold outbreaks, and lead to expensive structural damage.
Luckily, fixing leaky windows yourself is an achievable DIY project. In this article, we’ll help you identify where your window leaks may be coming from so you can fix them. Then we’ll help you figure out if you can do this simple repair yourself—or if you need outside help.
Find the source of your window leak
The minute you notice a leaking window, you should take action. A drafty window is one thing, but once you start getting water into your home, you risk developing black mold and experiencing structural damage. Worst case, a leaky window could be the symptom of a larger issue.
That’s why it’s smart to investigate and take care of the problem at the source. A quick-fix patchwork repair job could delay a larger, pricier repair down the road.
So where might this leaking water be coming from?
Was your window installed improperly?
Leaks around your windows may be due to improper window installation. Installing a window correctly takes training and skill. If your windows were installed with nails that aren’t corrosion resistant or you notice gaps in the flashing around your windows, you’ll need to call in the professionals and have them redone.
Check your original window warranty to see if the work is covered. Unfortunately, improperly installed windows will cost you extra money every month in higher energy bills and leave your home vulnerable to serious water damage, so it’s best to replace them as soon as possible.
Are leaks coming from your roof?
Leaks that appear to be coming from your windows may actually be originating from a much more expensive problem: your roof.
Get on your roof (or hire someone to climb up there) and inspect it. If you notice water stains, broken roof flashing, missing shingles, or rust on your chimney flashing, you may need outside help. Roofing issues can escalate quickly, so you’ll want to call a professional immediately if you notice any problems.

Has your sealant broken down?
This is the most common cause of window leaks. The chemical components in the sealants surrounding your window will break down over time and may allow water to start seeping into your home. If you notice that there’s condensation at the edges of your windows or the caulk around your frames appears discolored or cracked, it’s time to recaulk.
Not to worry—learning how to reseal your windows is an excellent beginner-level DIY project that we’ll walk you through below.

How to recaulk your leaky window
Replacing the caulking on your windows is an entry-level DIY project. The materials aren’t expensive and you can accomplish this project in as little as an hour.
Check your warranty
Even if you’ve done all of your detective work, it’s a good idea to consult with a home window replacement professional. Let their trained eyes have a look. If your leak is traceable back to improper installation or a mechanical issue with the window itself, you may be able to get this repair project covered under your warranty.
Gather your Materials
To recaulk a window yourself, you’ll need the following:
- Putty knife
- Spatula
- Paper towels
- Caulk gun
- Nail
- Tube of caulk
Talk to the people at your local home store to determine which type of caulk is best. You can also take a look at Energy.gov—they have great resources and a handy chart to help you choose.

Step One: Remove the worn-out caulk
Take out your putty knife and peel away the old caulk for a fresh start. If you try to cover over your old caulk with a fresh layer, the old caulk will continue to degrade and leave you vulnerable to further water damage. Create a clean, dry surface for your new caulk to adhere.
Step Two: Get your caulk gun ready
Next, you’ll want to prepare your caulk for application. Cut the top off the nozzle of your fresh tube. Start with just a small snip to get the most precise stream. You can always make the hole bigger if you decide you want a wider application. Before you load your tube into the caulking gun, take a nail and insert it into the cut nozzle to round out the opening, then remove it. Your tube of caulk is now open, loaded, and ready to be applied.
Step Three: Apply the caulk
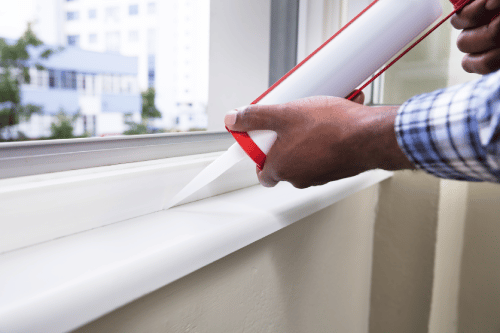
Apply steady pressure on the caulking gun trigger as you trace around your window. Move deliberately as you work to get an even stream of caulk. Next, you’ll smooth over your handiwork with a spatula. This should even out any patchiness and leave your windows with a clean look.
Step Four: Clean up
Lastly, take a paper towel and wipe up any drips or messes before they dry. If you have spots that dry before you get to them, you can work on them gently with a razor blade, or give a light scrub with mineral spirits or denatured alcohol. Most caulks will dry in about an hour.
Congratulations— you’re all done!

Know when to call in the professionals
If you suspect that your leaking window is not due to worn-out caulk, it’s wise to consult with a professional. Water damage can lead to big problems in a home.
You’ll want to reach out to a professional if:
- The leak is traceable to your roof
- You notice mold on your window sill or drywall
- Your window frame or drywall feels soft to the touch
- The glass in your window is cracked
- Your window is no longer opening and closing with ease
- You suspect that your window was not installed correctly
If there are issues with your window’s installation or functionality, make sure to check if it’s still covered under warranty protection.
If your warranty is expired, it may be time to get new replacement windows. With a full frame window replacement, installers will get to take a look inside the walls around your windows and get a clear picture of any potential water damage before it gets more serious.
Replacement windows also save you money on your monthly home energy bills and are one of the smartest investments you can make in your home. Energy saving windows regularly rank as one of the projects with the highest return on investment (ROI) for savvy homeowners.
Ready to upgrade? Window Nation has your back. Every window we install goes through a rigorous twenty-point inspection process to ensure a water-tight seal. We’ve installed over one million windows nationwide and have qualified teams of highly-trained professionals at the ready. Reach out for a free quote today.


