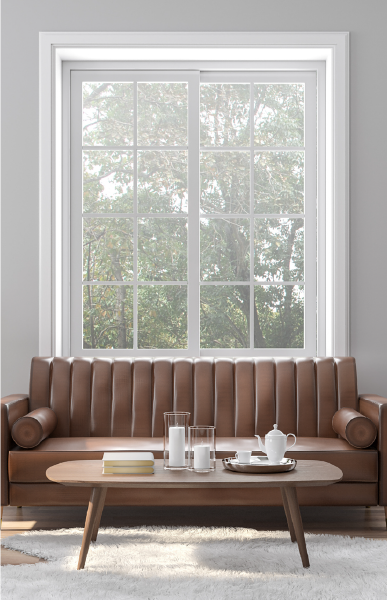
If you’re a homeowner looking to update your interior decor, window casings tend to be one of the top areas for redesign. With multiple options for materials, patterns, sizes, and colors, creating window casing lets you add a personal touch to your home without a massive remodel.
The seeming simplicity of window casing replacement also makes it a tempting target for DIYers—but is the project truly that simple?
We’ll let you be the judge as we walk you through an in-depth how-to process for installing window trim.
What is window casing?
Window casing refers to the outer layer of your window frame. Often called window trim or window molding, window casing usually serves a decorative purpose while also sealing out pesky drafts. In most cases, interior and exterior window casing match, but you can also change up your window casing styles for a unique and modern design.

How to Trim a Window
Now that you know what casing windows means, let’s dive into the process. Here are the seven steps to follow for a successful window casing project.
Step 1: Gather Your Tools and Materials
The first step for any DIY project planner is to acquire your tools, materials, and labor (in this case, yourself!). For a standard window casing project, you should have:
Tools:
- Air compressor
- Air hose
- Nail gun and nails (type and size will vary based on the size of your trim and the material of your wall)
- Caulk gun and caulk
- Hammer
- Level
- Miter saw
- Pry bar
- Safety goggles
- Tape Measure
- Utility knife
Materials:
- Pencil
- Sill trim (the amount of trim needed will vary based on the measured size of your window and you should always buy a little extra)
- Wood glue
- Optionally: Paint or wood stain (depending on your trim material)

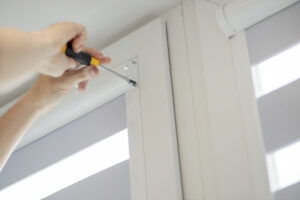
Step 2: Remove the Old Casing
Once you have your tools, it’s time to get rid of that crusty old trim.
- Grab your utility knife and place it gently between the old trim and the wall.
- Slowly apply pressure until you score through the paint and into the drywall.
- Carefully move your knife all the way around the window casing to separate the trim.
- Take your pry bar and insert it into the opening you’ve created with your knife.
- Gently pry the old trim away from the wall. You can also use a hammer against the pry bar to help the process along until the trim comes off.
Step 3: Measure and Mark your Casing Reveal
With your old trim removed, you’re left with a blank canvas for a fresh installation. Your next step will be measuring your reveal lines.
Reveal lines are the pencil marks you’ll lay down to help you align the new trim. They also help you install the trim with enough wiggle room for time-related adjustments such as the wood drying out or your house structure settling and sagging.
Use your tape measure and a pencil to mark beside each window jamb between ¼ and ⅛ inches from the inside edge. If you don’t know what a window jamb is, start with a vocabulary refresh on your interior window trim terminology—it’ll help you in all of your window DIY projects!

Step 4: Cut and Install your Top Trim
Once your reveal lines are marked, you’re ready to start cutting and placing the top section of the new trim.
- Lay a sheet of trim down on a safe work table and put on your safety goggles.
- Using your miter saw, create a 45-degree angle cut on one end of the piece of trim.
- Take the sheet of trim and hold it up to the top of your window. The bottom of your 45-degree angle should match up with your reveal line.
- Take a pencil and mark the appropriate cutting location on the other side of the trim to match up with the opposite reveal line. You may want to use two people for this step to ensure the trim stays level when you mark it.
- Return to the table and cut the new 45-degree angle on the opposite side of the trim.
- Hold the newly cut piece back up to the window to ensure both cuts line up with the reveal lines. If they don’t, slowly shave away at the cuts until they do.
- Attach the top trim to the top jamb using a nail gun, aiming to place nails every 6 inches or so.
Step 5: Cut and Install your Vertical Trim
Installing the first bit of trim is the hardest part! Now, it’s simply a matter of lining the rest up with the top. However, that does mean you must measure and install the top trim correctly, so take your time.
To install the vertical or side trim, follow Steps 4-A through 4-F with the side trim, but then JUMP TO THE FOLLOWING STEPS AND DO NOT NAIL THE TRIM ON IMMEDIATELY:
- Before you nail the trim onto the side jambs, take your wood glue and connect the top 45-degree angles of the side trim to the 45-degree angle of the top trim. This connection is referred to as the corner joint.
- Once the trims are aligned, use your nail gun to secure the side trim with nails 6 inches apart.
- Wipe away any excess glue before it dries.
- Once done with the left and right vertical trim, continue on to Step 6.
Step 6: Cut and Install your Bottom Trim
Installing the bottom trim should be one of the easiest parts of your window project—if you’ve measured the top and sides correctly.
To install the bottom trim, follow Steps 4-A through 4-F, then 5-A through 5-C (connecting the bottom corner joints). The bottom trim should fit perfectly in its place if your angles and measurements are consistent.
Step 7: Finish off the Trim and Check for Problem Spots
You’re almost done! The last few steps might not be as complex as the installation, but it’s essential to follow them with care for a professional look.
- Fill in the nail holes (if any) with wood putty.
- If you’re planning on staining or painting your window trim, now is the time. Just be sure to tape off your wall to avoid any spillage and wait for the paint to dry before continuing.
- Caulk the gap between the trim and the wall paint.
And there you have it! The DIY process of installing your brand new window casing. If you’ve done a quality job, you should be enjoying these new trims for decades to come. The real question is: How do you know if you’ve done a quality job?

Intimidated? When in Doubt, Leave it to the Experts
DIY home improvement projects may lead to that glowing satisfaction of a job well done…but they can also go wrong. After all, the only window casing worse than an old one is a poorly installed one that looks messy, crooked, or both.
If you’re not feeling confident in your DIY skills, feel free to reach out for a bit of help. With over one million windows installed across the USA, Window Nation is ready to take on even the most challenging projects. We offer replacement windows and installation services for any room or window in your home.
Request a free quote from Window Nation today and get started on your new window casing tomorrow.